The Professional Linux Users Group (ProLUG) provides a set of requirements and guidelines to contribute to this project. Below are steps to ensure contributors are adhering to those guidelines and fostering a productive version control environment.
Table of Contents
- How to be a Successful Contributor
- Signing your Git Commits with SSH
- Syncing your Fork with the Upstream ProLUG Repo
- Basic Contribution Workflow
- Supporting Material
How to be a Successful Contributor
To be an effective contributor understanding Git, whether through the command line or an external tool, will be an important part of contributing. To this effect it is important that any individual who contributes to this project have a working understanding of committing, merging, and other fundamental Git workflows.
For clarity this project utilizes GitHub for remote repositories and CI/CD testing pipeline workflows. Git and GitHub are two separate entities where GitHub provides the hosting services and Git provides the version control.
Prospective contributors are directed to several resources should they feel their competency with Git or GitHub falls short:
Git documentation:
Git and GitHub video tutorials:
- ByteByteGo's Git Explained in 4 Minutes (4m)
- Fireship's How to use Git and Github (12m)
- freeCodeCamp's Git and GitHub Crash Course (1hr)
Signing your Git Commits with SSH
Contributors who elect to contribute through the command line will need to verify their identities before their commits can be accepted. This step is not required if contributors will be submitting changes via GitHub.com itself since users will have verified their identities with GitHub's own verification process.
To reiterate, individuals contributing via command line will need to sign their commits through SSH. Signing GitHub commits helps ProLUG validate incoming commits from trusted contributors that reside outside the GitHub ecosystem. It can be quite trivial to impersonate users on GitHub and it is in the best interest of the project and contributors to observe this security practice.
It should also be noted that GitHub supplies tools like GitHub CLI
that abstract away the process of signing and verifying commits from the command line.
GitHub provides a gh auth login function to facilitate the procedure which contributors
can employ without the necessary changes suggested below.
To Sign your Git Commits with SSH:
Generate an SSH key pair if you don't have one:
ssh-keygen -t ed25519
Add SSH public key ('.pub' suffix) to GitHub as "Signing Key".
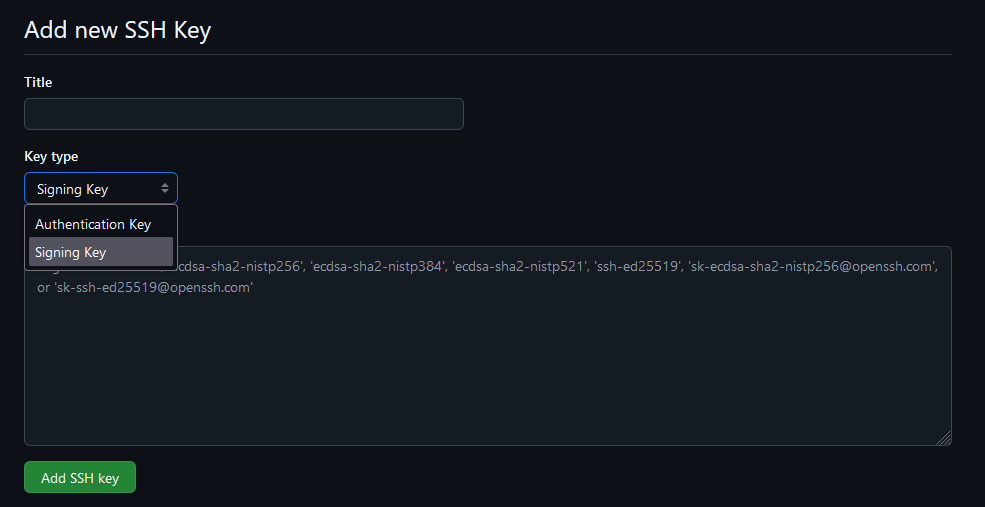
* GitHub.com -> Profile -> Settings -> GPG and SSH Keys -> Add SSH Key -> Drop down -> Signing Key
Below is a bash script that will attempt to configure signing Git commits on a localhost:
#!/bin/bash
GH_USERNAME="YourUsername"
git config --global gpg.format ssh
git config --global user.signingkey ~/.ssh/id_ed25519.pub
git config --global tag.gpgSign true
git config --global commit.gpgSign true
mkdir -p ~/.config/git
touch ~/.config/git/allowed_signers
echo "${GH_USERNAME} $(cat ~/.ssh/id_ed25519.pub)" > ~/.config/git/allowed_signers
git config --global gpg.ssh.allowedSignersFile ~/.config/git/allowed_signers
# Make a commit to verify
git log --show-signature -1
Make a commit after running those commands and then use git log --show-signature -1.
You should see something like Good "git" signature for <yourname> with ED25519 key SHA256:abcdef... if it worked.

Your commits should now be verified from your account. This helps us ensure that valid users are contributing to this project. Unverified commits will be scrutinized and likely discarded.
Syncing your Fork with the Upstream ProLUG Repo

In an effort to minimize merge conflicts we strongly suggest forks remain up to date with the original repository before committing changes. This will help us reduce pull request management overhead.
You can do this from the GitHub web UI easily with the Sync Fork button. If you want to do this from the terminal, you can add a new git remote called upstream.
git remote add upstream https://github.com/ProfessionalLinuxUsersGroup/lac.git
Then, to sync your local fork with the original repo, do a git pull from the upstream remote.
git pull upstream main
This fork should now be up to date with the original upstream repository.
Basic Contribution Workflow
You'll create your own fork of the repository using the GitHub web UI, create a branch, make changes, push to your fork, then open a pull request.
Comment First
If you'd like to work on a specific worksheet or lab, please let us know first by commenting on the issue so you can be assigned to it. This way, other contributors can see that someone is already working on it.
This helps the repository maintainers and contributors attain a high degree of visibility and collaboration before merging changes.
Create a Fork
Go to the original repository link. Click on "Fork" on the top right. Now you'll have your own version of the repository that you can clone.
git clone git@github.com:YOUR_USERNAME/lac.git
# Or, with https:
git clone https://github.com/YOUR_USERNAME/lac.git
Clone the Fork to your Local Machine
Then you'll need to clone your fork down to your local machine in order to work on it.
git clone git@github.com:yourname/lac.git
Create a New Branch
Whenever making changes contributors are highly encouraged to create a branch with an appropriate name. Switch to that branch, then make changes there.
For example, if you're working on the Unit 1 Worksheet:
git branch unit1-worksheet
git switch unit1-worksheet
# Or, simply:
git switch -c unit1-worksheet
Make changes to the u1ws.md.
Consider a few Useful Practices
The practices presented below are not required to contribute to the ProLUG course books but can streamline contributing to any project and are considered to some as best practice or incredibly useful when engaging in version control with Git.
Git Rebasing
Proper implementation of rebasing can leave a clean, and easily readable commit history for all concerned parties. Rebasing can also facilitate the management of branches and working directories in a notably active project.
The Git documentation provides a succinct explanation of its utility but also how it could potentially ruin a project and erase the work of other contributors.
Rebasing also plays a role in facilitating any commit reverts that may need to be made in the future. More on that will follow.
Git Rebasing documentation: https://git-scm.com/book/en/v2/Git-Branching-Rebasing
Commit Early, Often, and Squashing Commits
It is great practice to commit early, and often. This however can produce hard to read commits for repo maintainers and contributors. Squashing commits, which is a type of rebasing, can be utilized to compress a large number of commits made in a local repository before being pushed into a remote repository and eventual pull requests.
Below is an example of 4 local commits squashed into a single commit that was pushed remotely:
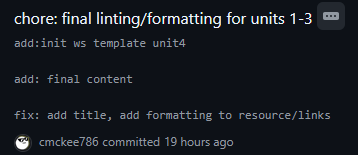
Squashing commits can improve readability, but its primary utility, especially for larger projects, may be in addressing an event where rolling back several commits due to a bug or test can be done with a single commit revert.
freeCodeCamp has a great write-up on this procedure. When done appropriately this can greatly facilitate the development process. Contributors are strongly encouraged to begin exploring these types of workflows if they never have.
Git Stashing
Another useful practice is to employ "stashing" uncommitted files in a local repository. This is useful in many contexts including stashing local changes to resolve recently introduced remote vs. local repo conflicts, or quickly switching working spaces.
Stashing effectively unstages any changes made in the local repo and saves them to be applied later. This can further help facilitate a rebase or merge before committing changes upstream for instance.
https://www.atlassian.com/git/tutorials/saving-changes/git-stash
https://git-scm.com/book/en/v2/Git-Tools-Stashing-and-Cleaning
Commit and Push your Changes
First make sure your forked repo is up-to-date with the original. Create your commit (make sure it's signed!), then push changes to your own fork on the new branch.
git commit -m "descriptive commit message"
git push origin unit1-worksheet
Comment your Changes
Before creating a pull request, make a comment on the issue containing your changes. We're doing this since the GitHub organization feature is paid and we are doing this for free, so there is only one person who is able to merge pull requests at the moment.
Create a Pull Request
Now you'll be able to go to the original repository link and go to the "Pull Requests" tab and create a new pull request.
Select your branch unit1-worksheet, and create a description and mention an issue by number (e.g., #5).
Supporting Material
Below are links to the necessary materials to build out the course templates:
- Look over the template pages wiki, or directly here:
Ancillary unit videos provided by Scott:
PDF and docs directly related to each Unit of the course: