If you are unable to finish the lab in the ProLUG lab environment we ask you
rebootthe machine from the command line so that other students will have the intended environment.
Required Materials
Putty or other connection tool Lab Server
Root or sudo command access
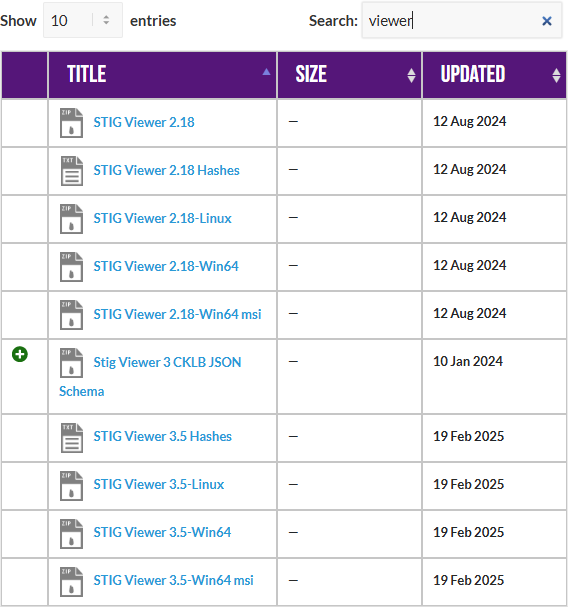
STIG Viewer 2.18 (download from https://public.cyber.mil/stigs/downloads/ )
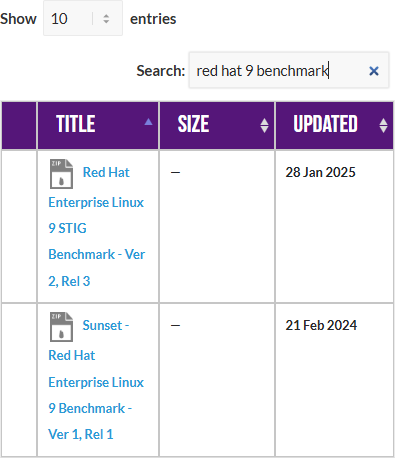
Download the STIG for RHEL 9 and the import it into your STIG viewer
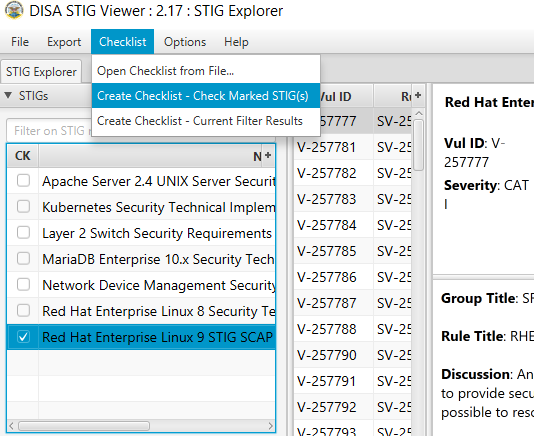
Create a checklist from the opened STIG for RHEL 9
Downloads
The lab has been provided below. The document(s) can be transposed to
the desired format so long as the content is preserved. For example, the .docx
could be transposed to a .md file.
EXERCISES (Warmup to quickly run through your system and familiarize yourself)
ls -l /etc/pam.d/
# What are the permissions and names of files? Can everyone read them?

cat /etc/pam.d/sshd

# What information do you see in this file?
# Does any of it look familiar to you?
Pre-Lab Warm-Up
Download the STIG Viewer 2.18 from - https://public.cyber.mil/stigs/downloads/
Download the STIG for RHEL 9 and the import it into your STIG viewer
Create a checklist from the opened STIG for RHEL 9
Lab 🧪
This lab is designed to have the engineer practice securing a Linux server or service against a set of configuration standards. These standards are sometimes called benchmarks, checklists, or guidelines. The engineer will be using STIG Viewer 2.18 to complete this lab.
PAM configuration
Connect to a hammer server
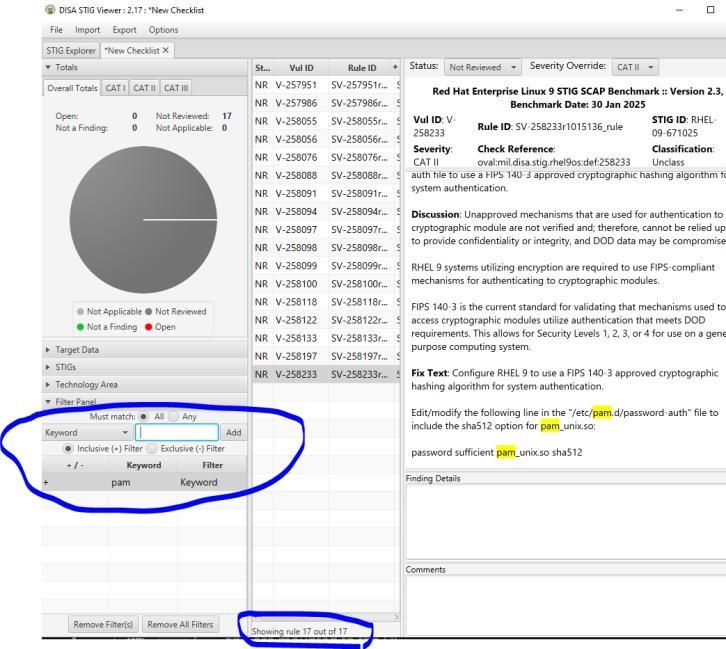
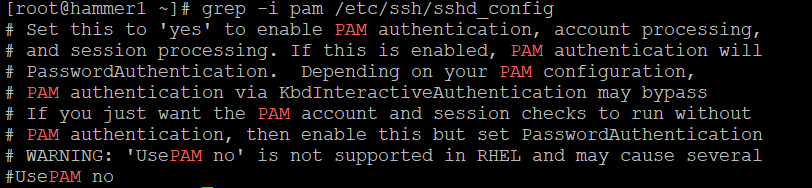
Filter by pam and see how many STIGS you have. (Why is it really only 16?)
Examine STIG V-257986
What is the problem?
What is the fix?
What type of control is being implemented?
Is it set properly on your system?
grep -i pam /etc/ssh/sshd_config
Can you remediate this finding?
Check and remediate STIG V-258055
What is the problem?
What is the fix?
What type of control is being implemented?
Are there any major implications to think about with this change on your system? Why or why not?
Is it set properly on your system?
How would you go about remediating this on your system?
Check and remediate STIG V-258098
What is the problem?
What is the fix?
What type of control is being implemented?
Is it set properly on your system?
Filter by "password complexity"
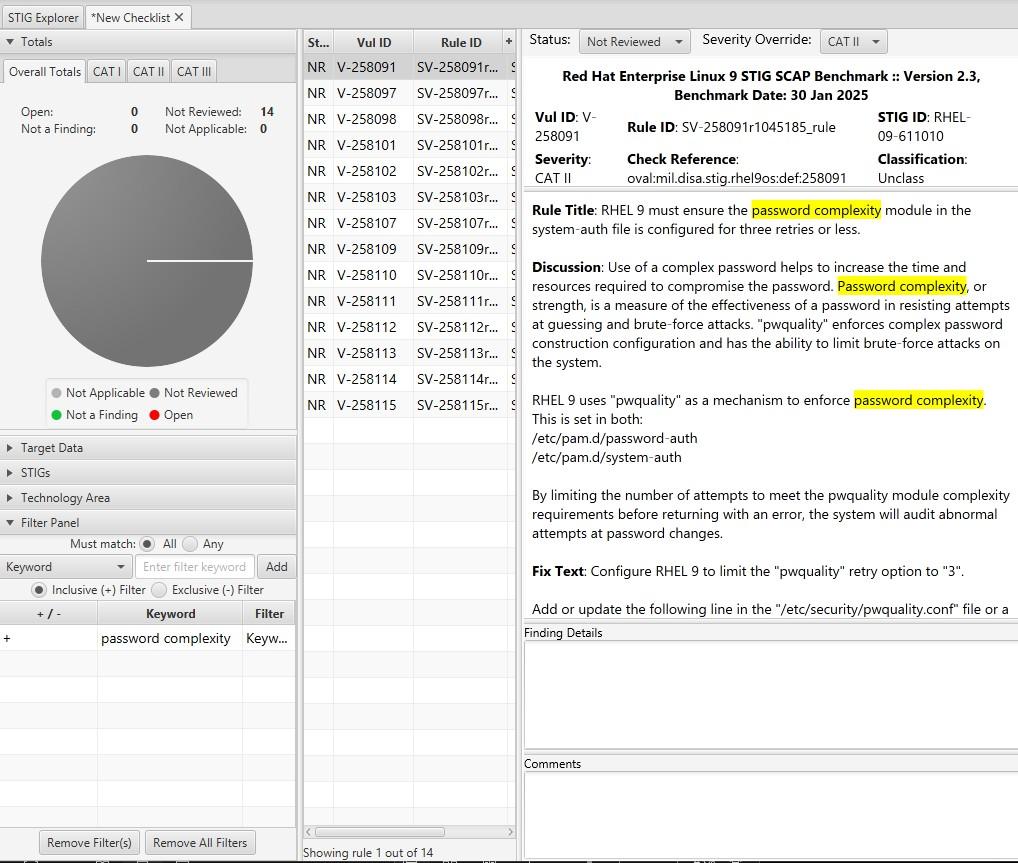
How many are there?
What are the password complexity rules?
Are there any you haven't seen before?
Filter by sssd
How many STIGS do you see?
What do these STIGS appear to be trying to do? What types of controls are they?
OpenLDAP Setup
You will likely not build an LDAP server in a real world environment. We are doing it for understanding and ability to complete the lab. In a normal corporate environment this is likely Active Directory.
To simplify some of the typing in this lab, there is a file located at
/lab_work/identity_and_access_management.tar.gz that you can pull down to your system with the correct .ldif files.
[root@hammer1 ~]# cp /lab_work/identity_and_access_management.tar.gz .
[root@hammer1 ~]# tar -xzvf identity_and_access_management.tar.gz
Install and configure OpenLDAP
1. Stop the warewulf client
[root@hammer1 ~]# systemctl stop wwclient
2. Edit your /etc/hosts file
Look for and edit the line that has your current server
[root@hammer1 ~]# vi /etc/hosts
Entry for hammer1 for example:
192.168.200.151 hammer1 hammer1-default ldap.prolug.lan ldap
3. Setup dnf repo
[root@hammer1 ~]# dnf config-manager --set-enabled plus
[root@hammer1 ~]# dnf repolist
[root@hammer1 ~]# dnf -y install openldap-servers openldap-clients openldap
4. Start slapd systemctl
[root@hammer1 ~]# systemctl start slapd
[root@hammer1 ~]# ss -ntulp | grep slapd
5. Allow ldap through the firewall
[root@hammer1 ~]# firewall-cmd --add-service={ldap,ldaps} --permanent
[root@hammer1 ~]# firewall-cmd --reload
[root@hammer1 ~]# firewall-cmd --list-all
6. Generate a password (Our example uses testpassword) This will return a salted SSHA password. Save this password and salted hash for later input
[root@hammer1 ~]# slappasswd
Output:
New password:
Re-enter new password:
{SSHA}wpRvODvIC/EPYf2GqHUlQMDdsFIW5yig
7. Change the password
[root@hammer1 ~]# vi changerootpass.ldif
dn: olcDatabase={0}config,cn=config
changetype: modify
replace: olcRootPW
olcRootPW: {SSHA}vKobSZO1HDGxp2OElzli/xfAzY4jSDMZ
[root@hammer1 ~]# ldapadd -Y EXTERNAL -H ldapi:/// -f changerootpass.ldif
Output:
SASL/EXTERNAL authentication started
SASL username: gidNumber=0+uidNumber=0,cn=peercred,cn=external,cn=auth
SASL SSF: 0
modifying entry "olcDatabase={0}config,cn=config"
8. Generate basic schemas
ldapadd -Y EXTERNAL -H ldapi:/// -f /etc/openldap/schema/cosine.ldif
ldapadd -Y EXTERNAL -H ldapi:/// -f /etc/openldap/schema/nis.ldif
ldapadd -Y EXTERNAL -H ldapi:/// -f /etc/openldap/schema/inetorgperson.ldif
9. Set up the domain (USE THE PASSWORD YOU GENERATED EARLIER)
[root@hammer1 ~]# vi setdomain.ldif
dn: olcDatabase={1}monitor,cn=config
changetype: modify
replace: olcAccess
olcAccess: {0}to * by dn.base="gidNumber=0+uidNumber=0,cn=peercred,cn=external,cn=auth"
read by dn.base="cn=Manager,dc=prolug,dc=lan" read by * none

dn: olcDatabase={2}mdb,cn=config
changetype: modify
replace: olcSuffix
olcSuffix: dc=prolug,dc=lan

dn: olcDatabase={2}mdb,cn=config
changetype: modify
replace: olcRootDN
olcRootDN: cn=Manager,dc=prolug,dc=lan

dn: olcDatabase={2}mdb,cn=config
changetype: modify
add: olcRootPW
olcRootPW: {SSHA}s4x6uAxcAPZN/4e3pGnU7UEIiADY0/Ob

dn: olcDatabase={2}mdb,cn=config
changetype: modify
add: olcAccess
olcAccess: {0}to attrs=userPassword,shadowLastChange by
dn="cn=Manager,dc=prolug,dc=lan" write by anonymous auth by self write by * none
olcAccess: {1}to dn.base="" by * read
olcAccess: {2}to * by dn="cn=Manager,dc=prolug,dc=lan" write by * read
10. Run it
[root@hammer1 ~]# ldapmodify -Y EXTERNAL -H ldapi:/// -f setdomain.ldif
Output:
SASL/EXTERNAL authentication started
SASL username: gidNumber=0+uidNumber=0,cn=peercred,cn=external,cn=auth
SASL SSF: 0
modifying entry "olcDatabase={1}monitor,cn=config"
modifying entry "olcDatabase={2}mdb,cn=config"
modifying entry "olcDatabase={2}mdb,cn=config"
modifying entry "olcDatabase={2}mdb,cn=config"
modifying entry "olcDatabase={2}mdb,cn=config"
11. Search and verify the domain is working.
[root@hammer1 ~]# ldapsearch -H ldap:// -x -s base -b "" -LLL "namingContexts"
Output:
dn:
namingContexts: dc=prolug,dc=lan
12. Add the base group and organization.
[root@hammer1 ~]# vi addou.ldif
dn: dc=prolug,dc=lan
objectClass: top
objectClass: dcObject
objectclass: organization
o: My prolug Organisation
dc: prolug

dn: cn=Manager,dc=prolug,dc=lan
objectClass: organizationalRole
cn: Manager
description: OpenLDAP Manager

dn: ou=People,dc=prolug,dc=lan
objectClass: organizationalUnit
ou: People

dn: ou=Group,dc=prolug,dc=lan
objectClass: organizationalUnit
ou: Group
[root@hammer1 ~]# ldapadd -x -D cn=Manager,dc=prolug,dc=lan -W -f addou.ldif
13. Verifying
[root@hammer1 ~]# ldapsearch -H ldap:// -x -s base -b "" -LLL "+"
[root@hammer1 ~]# ldapsearch -x -b "dc=prolug,dc=lan" ou
14. Add a user
Generate a password (use testuser1234)
[root@hammer1 ~]# slappasswd
[root@hammer1 ~]# vi adduser.ldif
dn: uid=testuser,ou=People,dc=prolug,dc=lan
objectClass: inetOrgPerson
objectClass: posixAccount
objectClass: shadowAccount
cn: testuser
sn: temp
userPassword: {SSHA}yb6e0ICSdlZaMef3zizvysEzXRGozQOK
loginShell: /bin/bash
uidNumber: 15000
gidNumber: 15000
homeDirectory: /home/testuser
shadowLastChange: 0
shadowMax: 0
shadowWarning: 0

dn: cn=testuser,ou=Group,dc=prolug,dc=lan
objectClass: posixGroup
cn: testuser
gidNumber: 15000
memberUid: testuser
[root@hammer1 ~]# ldapadd -x -D cn=Manager,dc=prolug,dc=lan -W -f adduser.ldif
16. Verify that your user is in the system.
[root@hammer1 ~]# ldapsearch -x -b "ou=People,dc=prolug,dc=lan"
17. Secure the system with TLS (accept all defaults)
[root@hammer1 ~]# openssl req -x509 -nodes -days 365 -newkey rsa:2048 -keyout /etc/pki/tls/ldapserver.key -out /etc/pki/tls/ldapserver.crt
[root@hammer1 ~]# chown ldap:ldap /etc/pki/tls/{ldapserver.crt,ldapserver.key}
[root@hammer1 ~]# ls -l /etc/pki/tls/ldap*
Output:
-rw-r--r--. 1 ldap ldap 1224 Apr 12 18:23 /etc/pki/tls/ldapserver.crt
-rw-------. 1 ldap ldap 1704 Apr 12 18:22 /etc/pki/tls/ldapserver.key
[root@hammer1 ~]# vi tls.ldif
dn: cn=config
changetype: modify
add: olcTLSCACertificateFile
olcTLSCACertificateFile: /etc/pki/tls/ldapserver.crt

add: olcTLSCertificateKeyFile
olcTLSCertificateKeyFile: /etc/pki/tls/ldapserver.key

add: olcTLSCertificateFile
olcTLSCertificateFile: /etc/pki/tls/ldapserver.crt
[root@hammer1 ~]# ldapadd -Y EXTERNAL -H ldapi:/// -f tls.ldif
18. Fix the /etc/openldap/ldap.conf to allow for certs
[root@hammer1 ~]# vi /etc/openldap/ldap.conf
#
# LDAP Defaults
#

# See ldap.conf(5) for details
# This file should be world readable but not world writable.

#BASE dc=example,dc=com
#URI ldap://ldap.example.com ldap://ldap-master.example.com:666

#SIZELIMIT 12
#TIMELIMIT 15
#DEREF never

# When no CA certificates are specified the Shared System Certificates
# are in use. In order to have these available along with the ones specified # by TLS_CACERTDIR one has to include them explicitly:

TLS_CACERT /etc/pki/tls/ldapserver.crt
TLS_REQCERT never

# System-wide Crypto Policies provide up to date cipher suite which should
# be used unless one needs a finer grinded selection of ciphers. Hence, the
# PROFILE=SYSTEM value represents the default behavior which is in place
# when no explicit setting is used. (see openssl-ciphers(1) for more info)
#TLS_CIPHER_SUITE PROFILE=SYSTEM

# Turning this off breaks GSSAPI used with krb5 when rdns = false
SASL_NOCANON on
[root@hammer1 ~]# systemctl restart slapd
SSSD Configuration and Realmd join to LDAP
SSSD can connect a server to a trusted LDAP system and authenticate users for access to local resources. You will likely do this during your career and it is a valuable skill to work with.
1. Install sssd, configure, and validate that the user is seen by the system
[root@hammer1 ~]# dnf install openldap-clients sssd sssd-ldap oddjob-mkhomedir authselect
[root@hammer1 ~]# authselect select sssd with-mkhomedir --force
[root@hammer1 ~]# systemctl enable --now oddjobd.service
[root@hammer1 ~]# systemctl status oddjobd.service
2. Uncomment and fix the lines in /etc/openldap/ldap.conf
[root@hammer1 ~]# vi /etc/openldap/ldap.conf
Output:
BASE dc=prolug,dc=lan
URI ldap://ldap.ldap.lan/
3. Edit the sssd.conf file
[root@hammer1 ~]# vi /etc/sssd/sssd.conf
[domain/default]
id_provider = ldap
autofs_provider = ldap
auth_provider = ldap
chpass_provider = ldap
ldap_uri = ldap://ldap.prolug.lan/
ldap_search_base = dc=prolug,dc=lan
#ldap_id_use_start_tls = True
#ldap_tls_cacertdir = /etc/openldap/certs
cache_credentials = True
#ldap_tls_reqcert = allow

[sssd]
services = nss, pam, autofs
domains = default

[nss]
homedir_substring = /home
[root@hammer1 ~]# chmod 0600 /etc/sssd/sssd.conf
[root@hammer1 ~]# systemctl start sssd
[root@hammer1 ~]# systemctl status sssd
4. Validate that the user can be seen
[root@hammer1 ~]# id testuser
Output:
uid=15000(testuser) gid=15000 groups=15000
Congratulations! Look at you, doing all the Linux.
Please reboot the the lab machine when done.
[root@hammer1 ~]# reboot